
To convert BMP to JPG, open the BMP in an editor that supports it and save a separate JPEG copy. Keep the source, choose the output size and quality, and reopen the result before sending it. Renaming .bmp to .jpg does not convert the file.
For a few files, Windows Paint or macOS Preview can provide a straightforward route. Photoshop offers more export control. For repeated work, the ImageMagick example below includes a real photographic source, measured output and a batch script with basic failure checks.
When BMP Files Show Up in a Workflow
BMP files can arrive from older archives, scans, screenshots and software exports. They are not a routine reason to change a camera's capture format. Work from the best available original: a BMP made from an already compressed JPEG cannot recover the detail that JPEG lost.
What the format means on a job
Compare these five properties before choosing a delivery format:
- Storage: an uncompressed BMP can be large, but the size difference depends on dimensions, bit depth, encoding, image content and JPEG settings. There is no guaranteed reduction percentage.
- Compression: BMP has multiple variants, including compressed forms. Ordinary JPEG uses lossy compression.
- Delivery: JPEG is widely useful for photographs in galleries and email. PNG may be preferable for sharp interface text, line art or transparency.
- Editing role: preserve a RAW capture or layered project when available. A flat BMP is not a replacement for those richer originals.
- Detail retention: JPEG can introduce artifacts around edges and in smooth areas. Inspect the actual output rather than treating a quality number as a guarantee.
Built-In Tools on Windows and macOS
These are documentation-based routes, not a claim that the Windows or Mac applications were tested for this article. The measured example later uses ImageMagick on Linux.
Windows Paint and macOS Preview
Windows: open the BMP in Paint and save a separate copy with JPEG selected as the file type. Choose a new name or destination and check the saved result. Microsoft's Paint documentation confirms BMP and JPEG among the supported save formats. Menu wording can vary by version; do not rely on a Photos save flow that may differ on your installation.
macOS: open the file in Preview, choose File > Export, select JPEG in Format, adjust quality and save under a new name or location. Apple also documents selecting multiple images in one window's sidebar for conversion. Follow the Preview conversion instructions.
Quality and dimensions both matter
A JPEG quality control trades compression against visible artifacts. Its scale is application-specific; a value of 85 in one editor is not necessarily equivalent to 85 elsewhere. Start with a representative image and compare the result at its intended display size and at full size.
Check pixel dimensions separately. A tiny, high-quality JPEG is still too small for a large print. Conversely, a full-resolution export may be unnecessary for a small web preview. Preserve a separate final version when making smaller sharing copies.
Professional Apps for Tighter Control
Use the application that holds the approved edit. Finish the crop and color work before making the delivery JPEG, and retain the editable project for later revisions.
Photoshop for controlled output
Open the BMP, review its color interpretation and save a separate JPEG copy using the available JPEG saving or export option. For conventional web viewing, Adobe recommends sRGB; use Edit > Convert to Profile when a conversion is needed. Assigning a different profile without converting the pixel values is a different operation.
Include an appropriate ICC profile when saving. Adobe's online color guidance and profile embedding instructions explain those choices. A profile helps compatible software interpret colors; it cannot make every uncalibrated screen identical.
If layers or retouching must remain editable, keep the PSD or other suitable project separately. See the PSD-to-JPEG guide for that handoff.
Lightroom and BMP compatibility
Do not assume you can import a folder of BMPs directly into Lightroom Classic. BMP is absent from Adobe's supported image format list. If Lightroom is required for the next editing stage, first create a supported lossless intermediate such as TIFF in a compatible editor, preserving the needed pixels and color information.
For files already supported and edited in Lightroom Classic, use File > Export, choose JPEG and review the destination, dimensions, profile and metadata. Do not introduce an extra conversion merely to use Lightroom when Paint, Preview, Photoshop or ImageMagick already meets the job's requirements.
What to keep on and what to strip
- Color information: preserve or deliberately convert the profile according to the destination. Do not strip it indiscriminately.
- Metadata: decide which authorship, rights, location and other fields should travel. Check the exported file rather than assuming a preset removes every sensitive field.
- Batch selection: confirm the intended images and export names before processing the set.
- Quality: choose for the actual destination and inspect representative results.
ImageMagick and the Command-Line Path
The following example was run with ImageMagick 7.1.2-31 on Linux. It uses a real cherry-tree photograph by Benjamin Gimmel, supplied as a PNG in Google's WebP comparison collection. A 24-bit BMP was prepared from that PNG without changing its decoded pixels, then converted to JPEG. This is one sample, not a general compression benchmark or a camera-original image.
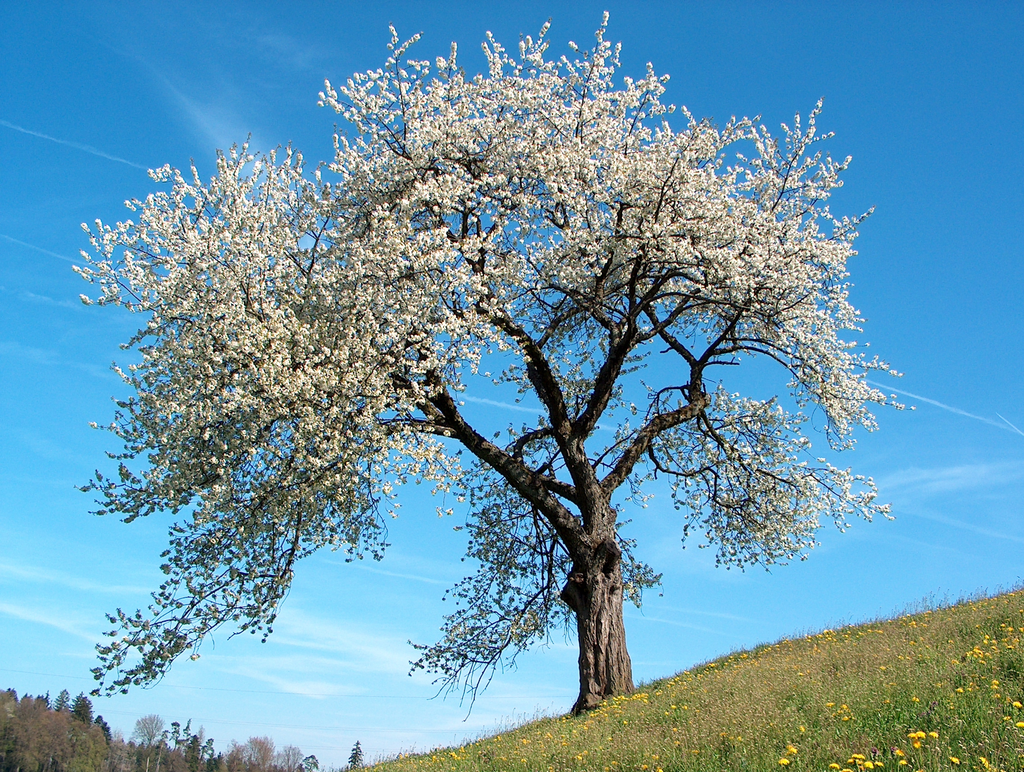
Source photograph: Benjamin Gimmel, flowering cherry tree, CC BY-SA 3.0, via Google's comparison gallery. The photograph above is the PNG reference; the downloadable BMP was prepared from it for this example.

The basic one-file command
Download the prepared BMP source into a working folder. With ImageMagick installed, run this command there, choosing an output name that does not already exist:
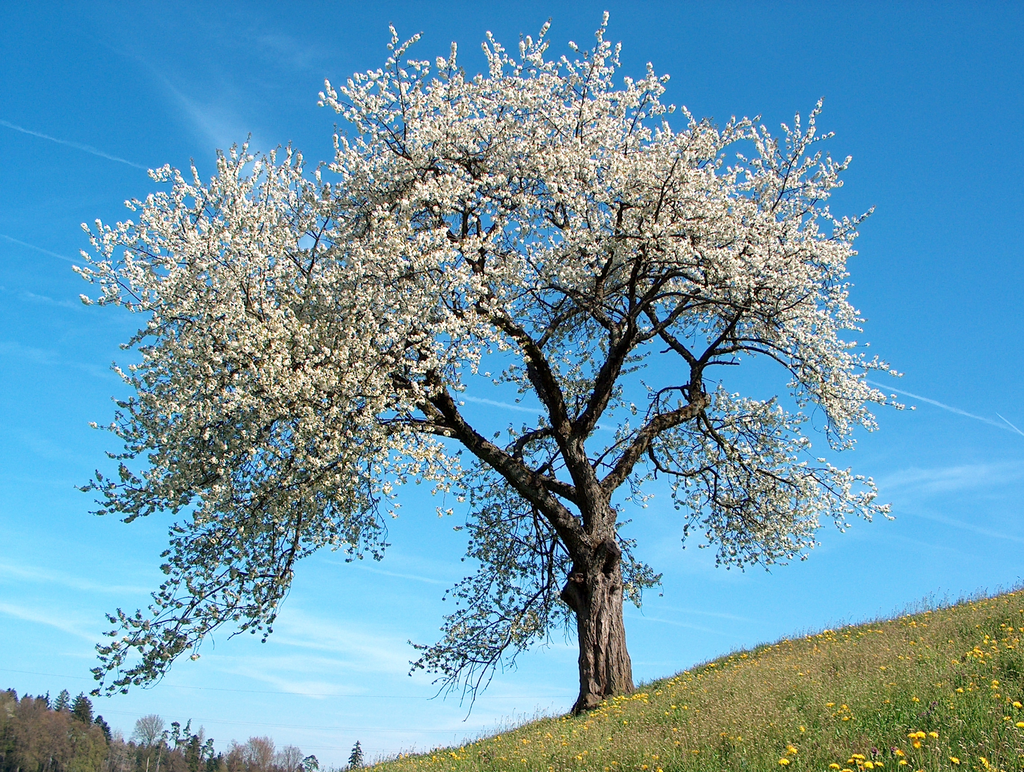
magick cherry-source.bmp -quality 85 cherry-quality85.jpgThe example uses quality 85 as an experimental setting, not a universal recommendation. It does not resize the image. The source is opaque; no transparency handling was needed for this particular command. A JPEG cannot retain transparency, so choose a background explicitly for other inputs that contain it.
The measured results were:
- BMP source: 2,371,638 bytes, 1024 × 772 pixels, three color channels.
- JPEG output: 296,183 bytes, 1024 × 772 pixels, three color channels.
- Source preservation: the prepared BMP had zero differing decoded pixels compared with the PNG reference. The JPEG is lossy and is not claimed to be pixel-identical.
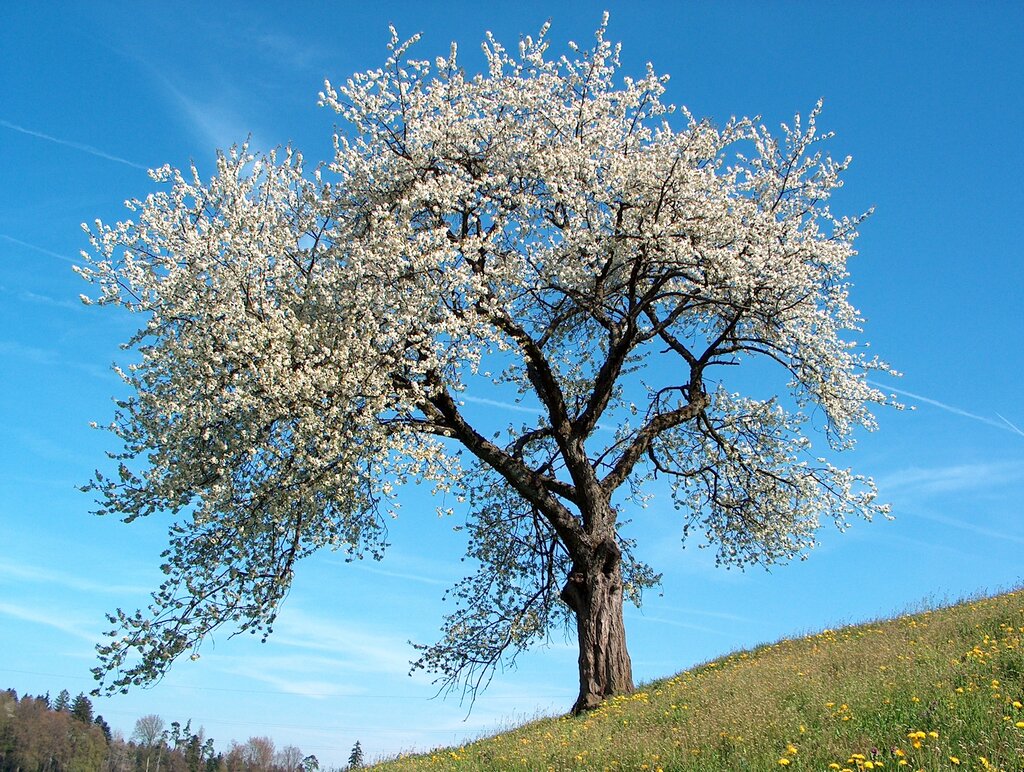
Actual conversion output, with the same photograph credit and license. Compare the fine branches, blossoms and blue sky against the reference. Open the JPEG at full size. The smaller file is a result for this image and command only.
The folder-level workflow
This Bash example requires ImageMagick 7. Save it as bmp-to-jpg-batch.sh, then run it with an input directory and a new output directory, for example bash bmp-to-jpg-batch.sh ./input ./jpeg-output. It processes only the top-level BMP files. Do not use the output folder concurrently from another process.
#!/usr/bin/env bash
set -euo pipefail
if (( $# != 2 )); then
  printf 'Usage: bash bmp-to-jpg-batch.sh INPUT_DIR NEW_OUTPUT_DIR\n' >&2
  exit 2
fi
input=$1
output=$2
[[ -d "$input" ]] || { printf 'Input directory missing\n' >&2; exit 2; }
[[ ! -e "$output" && ! -L "$output" ]] || {
  printf 'Output path already exists; choose a new name\n' >&2
  exit 2
}
command -v magick >/dev/null
shopt -s nullglob nocaseglob
files=("$input"/*.bmp)
if (( ${#files[@]} == 0 )); then
  printf 'No BMP files found\n'
  exit 0
fi
mkdir -- "$output"
for source in "${files[@]}"; do
  [[ -f "$source" ]] || { printf 'Not a regular file: %s\n' "$source" >&2; exit 1; }
  name=${source##*/}
  destination="$output/$name.jpg"
  if ! magick "$source" -background white -alpha remove -alpha off -quality 85 "$destination"; then
    printf 'Conversion failed: %s; output folder is incomplete\n' "$source" >&2
    exit 1
  fi
  magick identify "$destination"
done
printf 'Finished. Review the JPEGs before delivery.\n'
The script accepts .bmp and .BMP, quotes filenames containing spaces, refuses an existing output path and reports an empty input folder. It preserves the original extension in the output name, so photo.bmp becomes photo.bmp.jpg. That makes the source-to-output relationship explicit.
For transparency it composites onto white before making the JPEG; change that choice only if another background is intended. The script does not resize, standardize an unknown color profile, remove private metadata or decide whether the image looks acceptable. Review those separately.
Checks performed with copies of the photographic BMP covered lowercase/uppercase names, a name containing spaces, an empty folder, a deliberately invalid BMP and a pre-existing output directory. Valid files converted; empty input reported no work; invalid input stopped with an error; an existing destination was refused. Input hashes remained unchanged. If a later file fails, earlier outputs can remain in an incomplete folder: resolve the failure before delivery.
See ImageMagick's command-line options for quality, alpha and color-profile behavior. Do not use blanket metadata stripping when you need to preserve the ICC profile.
When this path helps
- Large folders: automate repeated conversions while retaining a source-to-output mapping.
- Repeat jobs: reuse reviewed settings, then check whether the next job needs changes.
- Thumbnail sets: add an intentional resize only after confirming the required dimensions; the sample script does not resize.
- Consistent delivery: apply the same chosen export settings, while still reviewing exceptions and failures.
Online Converters and When to Use Them
Server-side versus in-browser
A website may process a file on your device or upload it to a server. “Browser-based” does not establish which model it uses, nor does it guarantee that no other data leaves the page.
Do not upload confidential, unreleased or restricted client images to an unapproved converter. If you cannot establish acceptable processing, retention and permission, use an approved local workflow. No third-party converter's privacy behavior was tested for this article.
What to check before uploading anything
- Privacy model: determine where image processing happens, what is transmitted and how stored data is handled.
- Batch support: check count, size and format limits before choosing the tool.
- Archive handling: establish whether archives are supported and what they contain; do not include unrelated files merely to package a batch.
- Output controls: confirm that quality, dimensions, transparency and color handling meet the destination's needs.
- File sensitivity: check client permission and the service's terms before selecting the file, not after uploading it.
For an application already using Cloudinary, its format documentation lists BMP upload/transformation support and explains format selection in delivery URLs. The f_jpg parameter requests JPEG output. This is a server-based delivery integration, not a local converter or permission to upload a client's image. Account configuration and access controls still apply.
Keeping the Right Working Master
What should stay untouched
Keep the best original available: RAW data, a layered project, or a suitable lossless raster source. If the BMP is the only source, preserve it before converting. If it was made from a JPEG, storing it as BMP does not restore discarded detail.
PNG or TIFF may be better lossless intermediates for the next application, depending on transparency, bit depth and metadata needs. Repeated JPEG recompression can add loss, so make new delivery versions from the master instead of repeatedly opening and saving the previous JPEG.
If the recipient needs a document rather than an individual photo file, see the bitmap-to-PDF guide. Conversion format should follow the requested handoff.
From Finished Edit to Client Gallery
What makes the delivery stage matter
Finish the edit, export a clearly named JPEG version, reopen it, check dimensions and metadata, and reconcile the delivered set with the intended selection. Keep web previews separate from full-size finals when both are requested.
SendPhoto can provide the gallery handoff for finished JPEGs, with sharing and download controls you choose for that delivery. Prepare the files in your converter first and retain your own source archive. A gallery link does not replace the conversion, output review or backup.