
High-school senior pictures should look like the student who is graduating. A familiar jacket, a place he spends time, or an activity he actually enjoys can give a portrait more character than an elaborate theme chosen for him.
These eight senior picture ideas for guys are starting points to discuss with the student. Choose two or three that feel right, then vary the framing and expression within each one. You do not need eight locations, a tuxedo, or a trunk full of props.
Plan around the student first
Before choosing locations, ask:
- What feels like you? Pick a hobby, outfit or place he would choose even without a camera present.
- What should we skip? Include poses, props and expressions he dislikes. A serious expression is fine; a smile is not compulsory.
- Where will the pictures go? Check the school's actual yearbook deadline, crop and clothing requirements separately. Leave space around the head for an announcement crop.
- What can we realistically reach? Choose one main location and a nearby alternative. Confirm access, opening hours and any photography permission before the day.
- Who is choosing and receiving the pictures? Agree with the student and family on priorities, delivery and any permission needed before public sharing.
Bring one everyday outfit and one optional change. Check that both are comfortable when sitting and walking. A clean pair of shoes, a lint roller and a place to put bags are more useful than another last-minute costume.
For a simple lighting starting point, look for open shade outdoors or soft window light indoors. Turn the student slightly and watch how the light falls across his face before choosing the pose. Adobe's portrait-lighting guide explains how building shade and diffused window light can soften harsh shadows.
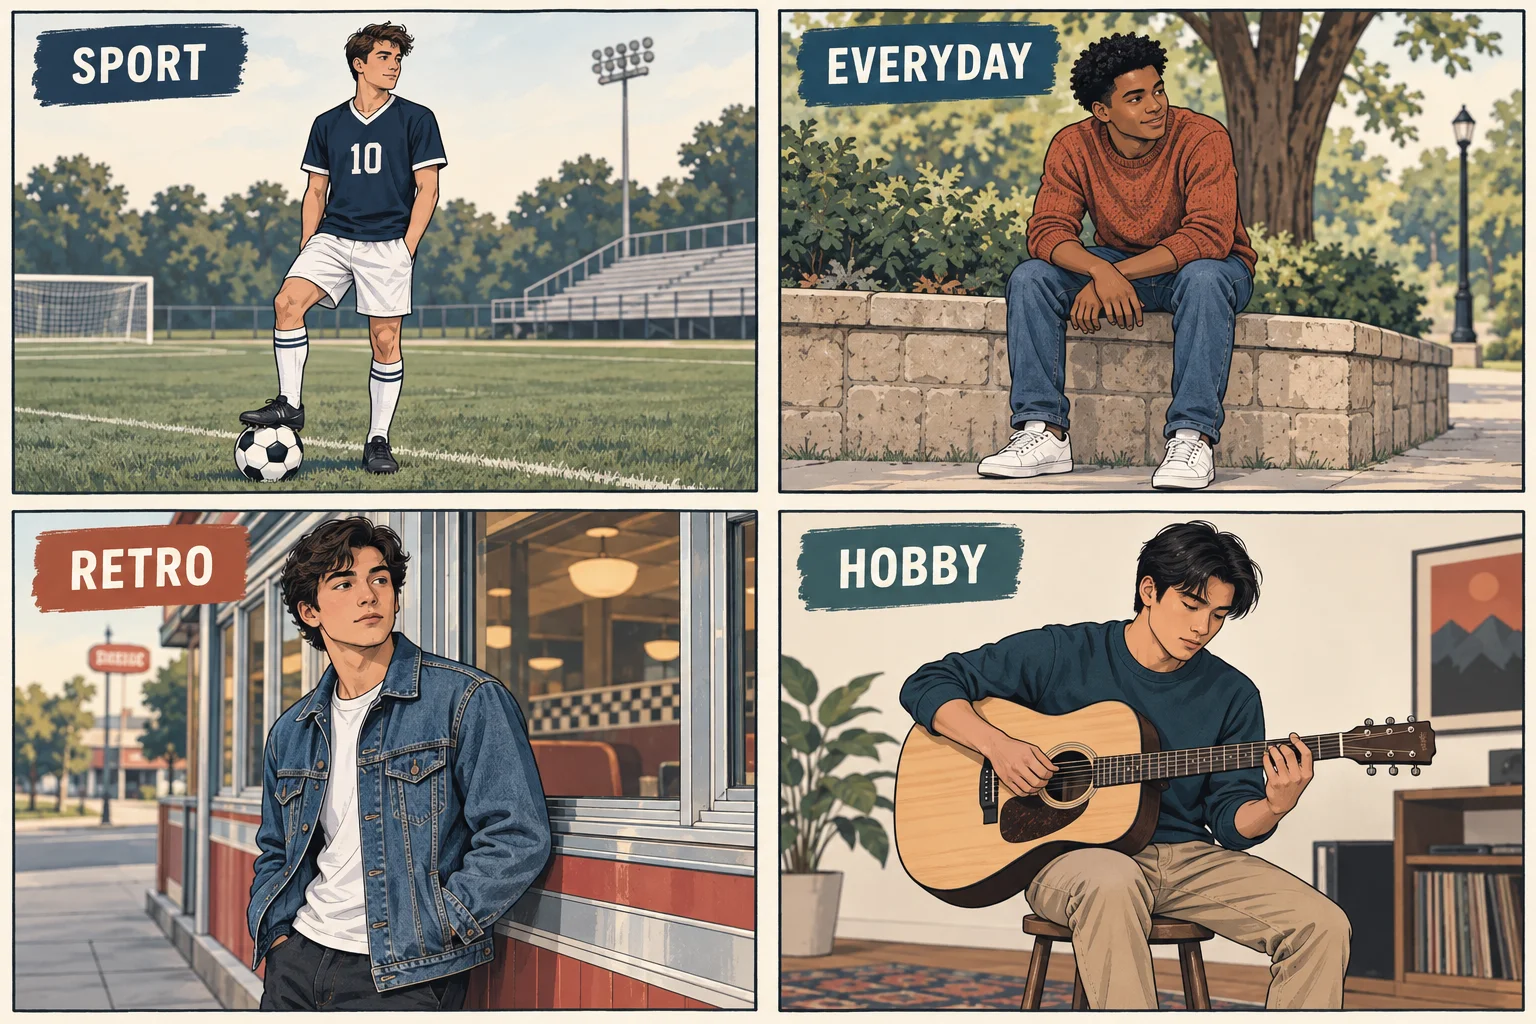
1. Sports and athletic action shots
Use the sport he plays, with his own equipment where practical. A field edge, quiet court or permitted track gives the picture context without needing a busy game behind him. Start with a still portrait before moving to action.
Pose cue: “Put your weight on the back foot, let your shoulders relax, and hold the ball beside your hip.” For a runner, try a standing portrait with spikes carried in one hand. Keep equipment below the face unless the detail itself is the subject.
Light and background: Find a clear patch of background away from spectators and signs. For the still portrait, open shade is an easy starting point. For movement, check a test frame for subject blur and adjust the shutter speed to suit the actual action and light.
Three-shot sequence:
- A full-length still frame showing the uniform and location.
- One familiar, controlled movement: a short dribble, an easy warm-up stride or a ball toss.
- A closer portrait between attempts, with the equipment still visible.
Ask what movement he can repeat comfortably. A portrait session does not need a new trick, a collision or a maximal-effort jump. If field access falls through, keep the same outfit and equipment against a plain nearby background.
2. Casual lifestyle and environmental portraits
An everyday setting can work well for a student who does not want a big theme. Try a familiar park bench, the outside of a favorite café with permission, or a quiet spot near school. A car is optional, and only useful if it means something to him.
Pose cue: “Sit near the front of the bench, lean forward a little, and rest your forearms on your thighs.” Then ask him to look toward a friend or tell you something about the place. Give one instruction at a time instead of arranging every finger.
Light and background: Choose a seat with even light across the face. Move your camera position to remove bins, parked cars or a pole directly behind his head. Keep enough of the setting to explain why you chose it.
Three-shot sequence:
- A wide seated frame that includes the place.
- A waist-up version with the same pose and a different eye line.
- A short walk toward or across the camera, followed by a pause.
If the spot is crowded, use its quieter edge. Avoid turning an ordinary portrait into a performance in front of an audience he did not want.
3. Vintage and retro-inspired styling
Choose one reference the student likes, such as a denim jacket, a record sleeve or the colors of an old diner. One clear detail can establish the idea without making the portrait look like a costume rental.
Pose cue: “Stand with one shoulder a little closer to the window, hold the jacket loosely, and look back toward me.” For a seated version, let him rest one arm on the table rather than forcing a dramatic pose.
Light and background: At a permitted indoor location, start beside a window and check whether overhead lights are creating an unwanted color cast. Simplify the background before adding more props. Do not rely on a heavy filter to make an unrelated setting feel coherent.
Three-shot sequence:
- A wider frame showing the chosen outfit and one recognizable setting detail.
- A closer portrait with the same styling.
- A detail of the jacket, record or other meaningful item, with his hands naturally using it.
Make one straightforward portrait without the prop as well. It gives him a choice if the themed version feels less like him after the session.
4. Creative hobbies and passion projects
A guitar, sketchbook, camera, chessboard or robotics project gives the student something familiar to do. Ask him to demonstrate an ordinary part of the activity instead of holding the object toward the lens like an advertisement.
Pose cue: “Play a few bars you know,” or “Show me the part of the sketch you're working on.” Make the activity frame first, then ask him to pause and glance up. Keep the object at a natural working height.
Light and background: Place the work area near soft light and clear unrelated clutter. Check that hands and the important part of the project are visible. A desk does not have to be spotless, but every bright object behind the face competes for attention.
Three-shot sequence:
- A wider portrait showing him in the workspace.
- A medium frame of him doing the activity.
- A close detail of his hands and the work, followed by a face-forward option if needed.
Let him correct how the equipment is held or used. Familiarity is the point; the pose should make sense to someone who shares the hobby.
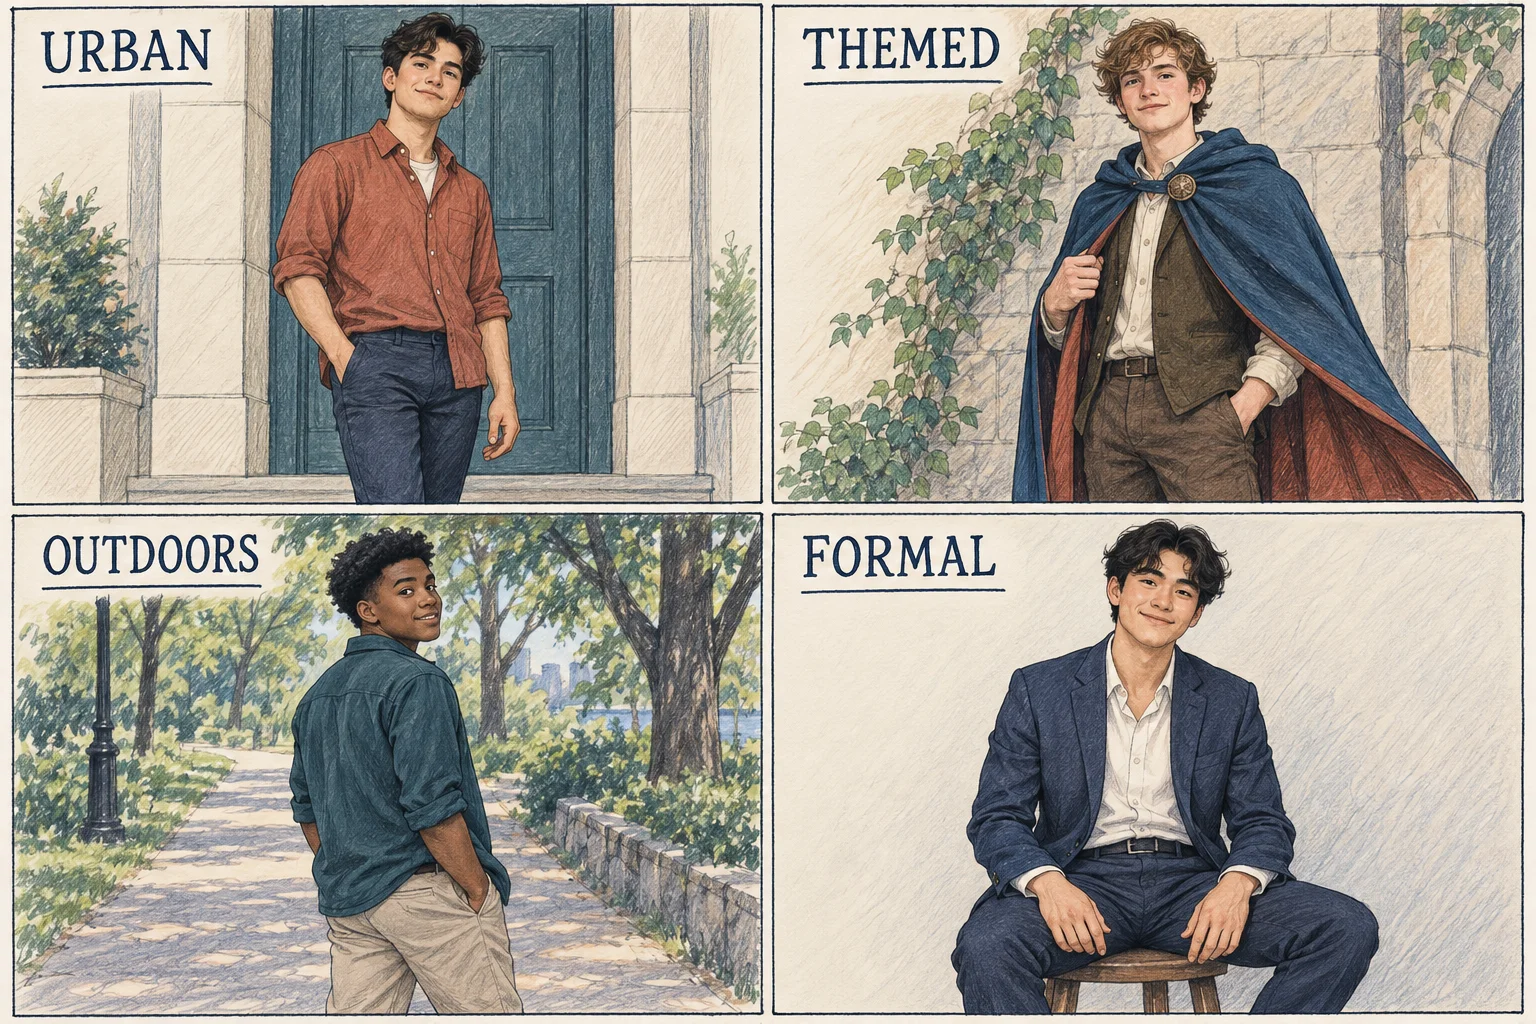
5. Urban and architectural locations
Use a building's lines to organize the frame: a doorway can surround the subject, a wall can provide negative space, and steps can offer different seated heights. You do not need a famous city location.
Pose cue: “Stand a step away from the wall, turn slightly, and put one thumb in your pocket.” For a seated option on permitted steps, stagger the feet and rest the hands comfortably rather than forcing symmetry.
Light and background: Look for a shaded wall facing brighter open space. Take a test frame and check both the face and the building edges. Change your position if a line appears to cut through his head.
Three-shot sequence:
- A wide frame showing the doorway or architectural lines.
- A medium standing portrait against a simpler portion of the wall.
- A walking frame along a clear pedestrian route.
Keep entrances clear and stay off roads, active rail lines and restricted rooftops. Choose the composition from places where everyone can safely stand.
6. Themed outfits and character styling
This idea suits a student who already enjoys cosplay, theater, a particular genre or expressive fashion. Ask what the outfit means to him and how prominently he wants it featured. It can be a small part of the session.
Pose cue: “Show me the stance you'd naturally use in that outfit.” Then simplify it: relax the shoulders, keep the face visible, and try a still version before adding movement. Avoid asking him to imitate a character he does not know or like.
Light and background: A plain wall or uncluttered shaded area gives an elaborate outfit room to read. Check reflective fabric, glasses and hats in a test frame; small changes in angle may be more useful than another prop.
Three-shot sequence:
- A full-length frame showing the complete outfit.
- A closer portrait with the face unobstructed.
- A detail of a handmade accessory or a comfortable signature gesture.
Pack an ordinary outfit too if he wants variety. Check the venue's rules before bringing large props, and leave weapon-like props out of public-location sessions.
7. Nature and outdoor adventure portraits
Choose a place he can comfortably reach in the planned clothes and shoes: a local trail, a lakeside path, a garden or a field with permission. The setting should support the portrait rather than turn it into a difficult hike.
Pose cue: “Walk a few steps along the path, pause, and look back toward me.” For a quiet frame, try a seated pose on a stable bench or a standing portrait with hands loosely together.
Light and background: Look for even shade rather than patches of sunlight across the face. If you plan for late light, check the location in advance and leave time to return before dark. Move the camera to separate the face from branches and bright gaps in the background.
Three-shot sequence:
- A wide frame with the student clearly visible in the landscape.
- A walking or paused-turn frame on the path.
- A closer portrait that keeps a little of the setting behind him.
Have a nearby sheltered alternative for poor weather. Staying on a clear path is enough; water entries, cliff edges and wildlife encounters add nothing essential to a graduation portrait.
8. Formal wear with a relaxed pose
A suit, jacket, dress shirt or tuxedo can make a useful second look if the student likes wearing it. A tuxedo is one option, not a requirement. Check the fit while seated as well as standing.
Pose cue: “Fasten the jacket if it sits comfortably, adjust one cuff, then let your hands fall.” Take the in-between moment. For a seated frame, open the jacket if needed and let him settle before changing the expression.
Light and background: Use a simple background and inspect dark fabric in a test frame so the jacket does not disappear into it. Soft light from the side can show the clothing's shape without making the expression overly severe.
Three-shot sequence:
- A full-length standing frame with room around the shoes.
- A waist-up portrait after the cuff or lapel adjustment.
- A seated version, with or without the jacket.
Ask for both a relaxed expression and a smile if he is comfortable. The aim is a portrait he recognizes himself in, not to make him look older.
Choose a small set, then make a shot list
Use this as a shortlist rather than a ranking:
- He wants minimal fuss: everyday clothes, one shaded location, seated and walking frames.
- An activity is central to his life: sports or hobby portraits, plus a clean frame without the equipment.
- He cares about clothes or visual style: retro, themed or formal portraits, with one simple background.
- He wants the place in the picture: urban or nature portraits, alternating wide views and closer expressions.
Here is a proposed 60-minute session plan for one location with nearby background options. It is a planning example, not a promise about how quickly every session will run. Reduce the number of ideas if travel, changing or access takes longer.
- Minutes 0–10: settle in, check light and clothing, make a simple standing portrait.
- Minutes 10–25: photograph the first chosen idea: wide frame, action or pose, closer expression.
- Minutes 25–40: change one element, such as outfit or nearby background, and photograph the second idea.
- Minutes 40–50: make the clean portrait and any agreed announcement or school-specific frame; leave room for the required crop.
- Minutes 50–60: revisit the student's favorite setup, make any missing detail and allow time to pack up.
Keep a short checklist on the day: one clear face portrait, one full-length frame, one picture showing an interest, one wider setting and one preferred expression. A smaller set with variety is easier to plan than rushing through all eight ideas.
Deliver pictures the student can choose from
Before delivery, finish the selection and edits in your usual photo editor. Keep file names consistent so the student and family can refer to the same picture when discussing an announcement crop or print.
Explain which files are included, when they will arrive and how to request any agreed changes. Confirm before using a student's portraits in your public portfolio.
When the finished photos are ready, the SendPhoto getting-started guide walks through creating a gallery, uploading photos and sharing access. Keep the handoff simple so the student can spend time choosing the portraits that feel like him.