
Bulk file upload means selecting many files for one upload job. For a photographer, the useful result is a complete, correctly organized delivery: the right exports, in the right collection, with failures identified before the client receives the link.
Start with a separate delivery folder and a simple record of its file names and count. Upload a small representative batch, check the result, then send the remaining files in manageable groups. If a group fails, reconcile what arrived before selecting anything again.
This guide combines practical workflow advice with current SendPhoto uploader behavior and documented transfer concepts. The screenshot is an existing SendPhoto product capture. The worked recovery example is fictional, not a measured upload or interruption test.
Table of Contents
- Prepare the delivery files
- Choose an upload method
- Upload a batch in SendPhoto
- Handle large RAW and video files
- Verify the gallery before delivery
- Recover a partially failed batch
Prepare the Delivery Files
A gallery delivery and a working archive serve different purposes. Keep camera originals, audio, sidecars and project files in your archive. Put only the files intended for this recipient in the delivery folder. Preserve a separate backup of the originals; an upload is not a reason to erase the cards or working copies.
Build a structure you can reconcile
For a wedding, a local project might contain RAW, VIDEO, SELECTS, FINAL_JPEG and FINAL_VIDEO folders. Inside FINAL_JPEG, separate Ceremony and Reception if those will be different gallery collections. These are suggested local folders, not a promise that an uploader will recreate your folder hierarchy automatically.
Use stable names such as smith-ceremony-0001.jpg and smith-highlight-v2.mp4. Spaces are not universally invalid, but consistent names make comparison easier. Avoid changing names halfway through a retry unless a name caused the error. If two cameras both produced IMG_0001, assign unique delivery names before upload so you can distinguish them later.
The photo organization guide covers the broader folder workflow. For this step, a short list is enough: file name, intended collection, size and upload status. Keep that list outside the gallery if the product does not provide an exportable report.
Check formats, sizes and account capacity
Before selecting the full shoot:
- Open representative local files. Check a JPEG, the largest file and each video or camera format you intend to deliver. Fix a damaged export locally first.
- Confirm destination support. An accepted extension does not guarantee that every camera variant or video codec will preview correctly. Keep client-ready JPEG exports separate from RAW originals.
- Review the largest file and total size. A per-file limit, available storage and upload allowance are separate constraints. Read the account’s current limits and any exact error shown; splitting a batch does not make an oversized individual file smaller.
- Check privacy and metadata. Preserve the creator/copyright information you intend to include, and remove unwanted location or personal data. Do not assume every preview or converted download retains the original metadata.
- Keep the source drive available. Leave the device powered, prevent sleep for the upload window and use a stable connection. Keep external drives connected until the job finishes.
For video, check resolution, codec, duration and playback before uploading. The video format guide distinguishes a container such as MP4 from the codec inside it. Do not simply rename a file extension to try to make it compatible.
Choose an Upload Method
Choose based on the destination’s documented capabilities, rather than assuming that a browser, desktop app or API is always faster or more reliable.
Browser or desktop uploader
A browser uploader is convenient when you are already organizing a client gallery. Keep its tab open until it reports completion. A desktop client can be useful when its service documents background upload and recovery after restart, but the presence of an installed app alone does not prove those features.
For either method, look for clear per-file status, useful error messages, supported formats and a documented response to interruption. Distinguish a retry while the app remains open from resuming after the browser or computer has restarted.
SFTP and API workflows
A studio may use a separate transfer service for editors or archival originals. Prefer an encrypted transport supported by that service. OpenSSH’s SFTP implementation transfers files over encrypted SSH; plain FTP should not be treated as equivalent.
An API can automate upload and reconciliation when the destination documents it. The team still needs to manage credentials, destination paths, failures and duplicate handling. These are general transfer options, not instructions for a SendPhoto desktop app, SFTP endpoint or public upload API.
If your main decision is how the client will receive the finished work, see the photo-sharing methods guide.
Upload a Batch in SendPhoto
Open the intended gallery and collection before choosing Upload. Select the files for that collection together. The current uploader supports multiple-file selection and tracks individual file jobs, so a batch can include both successful and failed items.
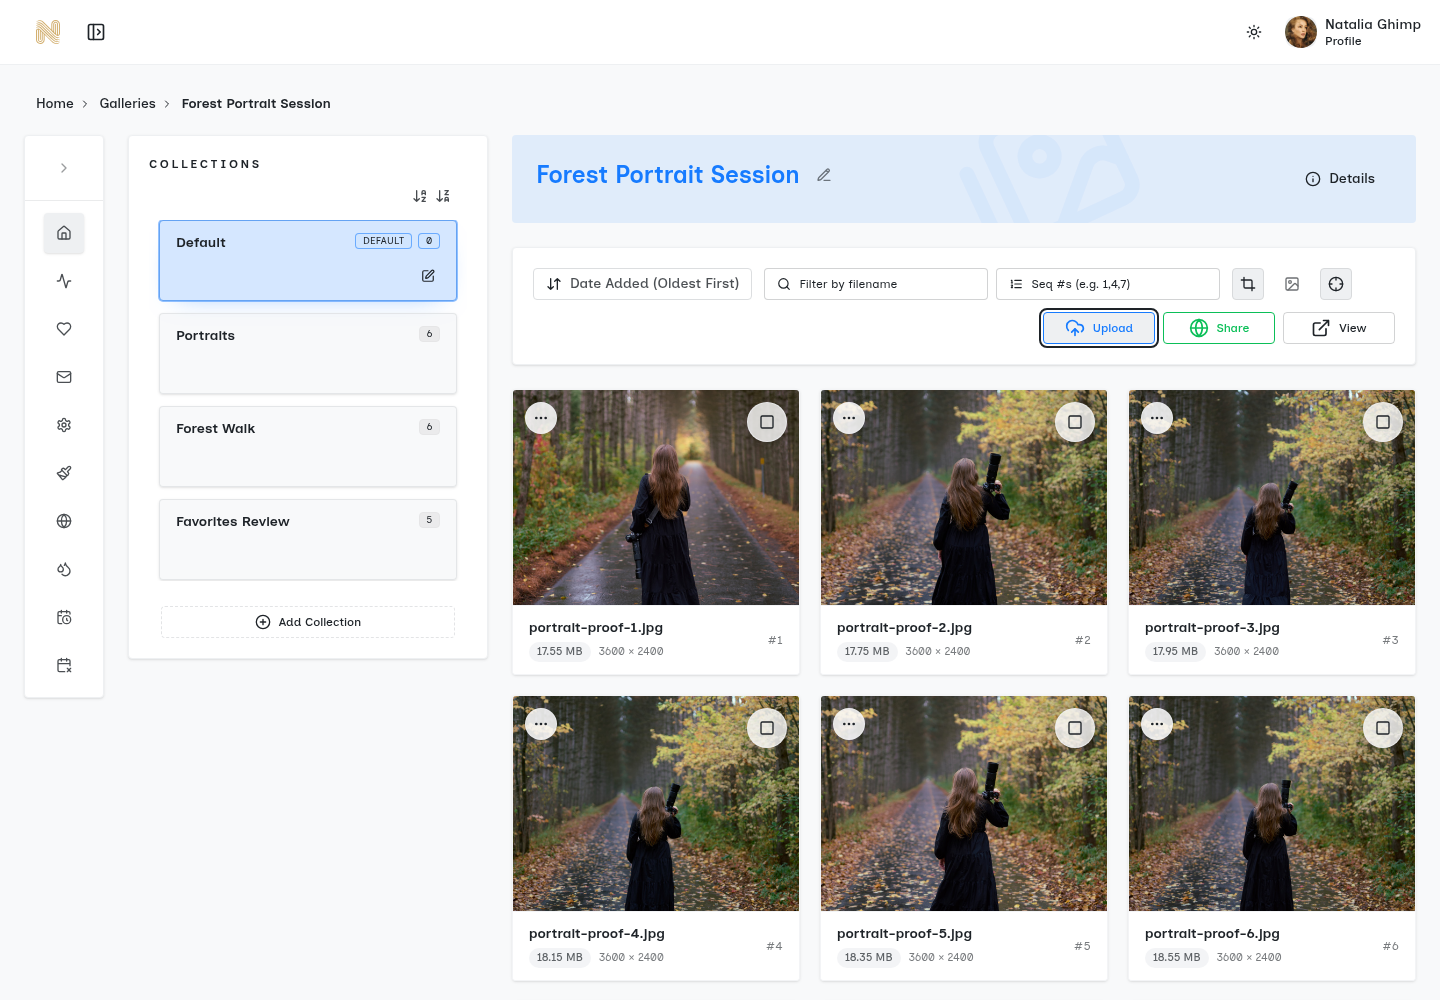
Existing SendPhoto screenshot: the Upload button sits above the gallery items, and collections appear on the left. This capture shows where to begin; it does not show a running transfer, an error report or a completed recovery test. Open the full-size screenshot.
Start with a small group containing the types and sizes you expect in the job. Confirm that the items appear in the intended collection and that previews are usable before selecting the remaining groups. A group size you can reconcile easily is more useful than a universal “best” number of files.
Watch for errors naming a specific file. The current uploader validates formats and displays upload failures; it also retries certain temporary transfer errors. Let the job settle before selecting the same files again. A duplicate-selection guard while an upload is running is not a promise that reuploading an already completed file will be deduplicated.
The supported-format list includes common JPEG and video formats and several camera RAW extensions. This does not establish compatibility for every RAW camera model or video encoding. Check representative files from your own camera and export settings before committing a full job, and keep the originals locally.
Handle Large RAW and Video Files
Large files occupy the connection longer and make the recovery behavior more important. A transfer may reach the end of its byte upload and still need finalization or preview processing. A progress indicator alone cannot tell you that the client’s video will play correctly.
Chunking, retries and resume are different
Chunking divides a file into parts. A retry resends a failed request. Resume requires the client and service to retain enough state to continue an interrupted upload. Whether this survives a closed tab or expired session depends on the implementation.
For a documented example, Microsoft Graph upload sessions expose missing byte ranges and session expiry. Those are Microsoft-specific rules, not a universal chunk size or a SendPhoto guarantee.
SendPhoto’s current upload implementation includes multipart transfer and limited automatic retries for certain temporary errors. That is not a promise that a closed tab can resume every unfinished file. Keep the upload page open; if an error remains, use the reconciliation process below instead of assuming all progress survived.
Plan the transfer window
Use your upload speed, not your advertised download speed, for a rough estimate. For example, 10 GB at a steady 20 megabits per second has an ideal transfer time of about 67 minutes: 10 billion bytes × 8 ÷ 20 million bits per second. This is arithmetic, not a benchmark. Overhead, competing traffic, retries and processing add time.
Use a stable wired connection if available, avoid starting several competing transfers, and leave time for verification. Separate RAW archives from delivery exports and video from photo batches when that makes failures easier to isolate. Do not apply heavy compression to originals simply to meet a deadline; create an agreed delivery export and retain the source.
Verify the Gallery Before Delivery
Confirm completion at three levels: inventory, usability and, when needed, file identity.
Check the files, not just the count
Compare expected names against the destination collection. Matching counts are helpful but can hide a missing file plus a duplicate. Open samples from the beginning, middle and end of the delivery, including any retried files and unusual formats. For video, check playback at several points and listen to the audio.
Download a sample through the delivery route the client will use. Check dimensions, file type and the intended version. A rendered preview may differ from an original download, so compare like with like.
If exact original bytes matter, compare SHA-256 hashes of the local original and downloaded file. Microsoft documents Get-FileHash for PowerShell. Matching hashes provide strong evidence that those two files contain the same bytes; a sample does not certify the whole batch. A mismatch can reflect conversion or a different export as well as a transfer problem. Investigate before attributing it to corruption.
Set access deliberately
Choose the gallery’s password and download settings to match the agreement with the client. Password protection gates gallery access; it does not prevent recipients from forwarding credentials. Download controls govern the offered downloads, not screenshots or copies already saved. Watermarks can help identify previews but do not prevent copying.
Use clear collection names and send the link to the intended recipient. Agree on any delivery deadline and manage access accordingly; do not assume automatic expiry or deletion. SendPhoto clients can open a shared gallery without creating an account, while any configured password still applies.
Recover a Partially Failed Batch
Stop and classify the failure before repeating the upload. Record the exact message and affected names while they are still visible.
Match the response to the error
- Unsupported format: check the exact extension and export. Create a supported delivery copy if appropriate; keep the original. Renaming the extension is not conversion.
- Too large: check the individual file against the limit. A smaller batch will not fix that file’s size.
- Storage or upload allowance: check the account limit identified by the error. Deleting files may free storage but does not necessarily restore an upload allowance.
- Connection or temporary service error: allow an active retry to finish, then inspect what arrived before starting another attempt.
- Uploaded but not usable: distinguish a processing delay from a broken local export or unsupported encoding. Note the item and contact support if it remains unresolved.
A worked recovery example
Suppose your delivery list contains 120 JPEGs. The job reports 117 successes and three failures. These are fictional numbers illustrating reconciliation, not a SendPhoto test result.
- Compare the 117 completed items with your local list. Identify the exact three missing names; do not rely only on the total.
- Record each error beside its file. If one file exceeds a size limit, create the intended replacement export and update your list. Keep the source original.
- Select only the missing or corrected files after the previous job has ended. Do not reselect all 120 as a first response.
- Compare names again after the retry. Confirm that the recovered items open and that no unintended duplicates were introduced.
- Finish the delivery checks, then send the gallery link.
If a retry still fails, give support the time, browser/device, file type and size, exact message and whether other files succeeded. Avoid sending passwords, private download URLs or sensitive client images in a public support post.
For a first gallery, the SendPhoto getting-started guide shows the delivery workflow. For an existing job, the priority is simpler: prepare a known set, upload it, reconcile failures and verify the result before sharing.