
Good corporate event photos give a communications team usable choices: a clear speaker image, a room view that establishes the occasion, natural interactions and the sponsor details promised in the brief. The work begins before the first guest arrives and ends with files the right people can find and use.
This guide includes a planning example, a credited photograph from a real business conference and a genuine SendPhoto interface screenshot. The planning example is illustrative, not a client-approved assignment. The conference photograph was made by its credited photographer; it is not a SendPhoto shoot or an end-to-end test of this workflow.
Start with the client’s business brief
Ask what the photographs need to support. Marketing may need website banners and social crops; communications may need correctly identified speakers for press; HR may want recognition and team participation; partnerships may need sponsor coverage. A documentary record also can be a valid deliverable. Agree the priorities rather than assuming every department wants the same gallery.
Five questions to settle before the event
- Purpose: which campaign, announcement or internal communication is this coverage for? Identify the primary recipient and the most important deliverable.
- Deadline and use: when will images be published, where will they appear and which orientations or dimensions are needed? Separate the first selects deadline from the full-gallery deadline.
- People and moments: which speakers, employees, guests and interactions must be covered? Get names, roles and a contact who can identify people on site.
- Brand and coverage limits: which sponsors and products need to appear, and which screens, conversations or areas must stay out of photographs?
- Approval: who chooses the final images and authorizes publication? Name one contact who can resolve conflicting requests while the event is running.
Keep the answers alongside the latest run of show. Include arrival and access times, stage positions, breaks, awards, demonstrations and any embargo. Ask who will tell you when the schedule changes.
Agree restrictions and practical access
Walk through the venue or review its floor plan with the organizer. Check sightlines, accessible routes, audience seating, camera positions, power and the location of sponsor displays. Confirm where you may stand during speeches and whether flash, stands or shutter noise are restricted. Keep aisles and exits clear.
Ask the organizer how photography notices, objections and any required permissions are handled, including employees, guests and minors. Agree a discreet way to identify people who should not be photographed and a contact for questions. Attendance alone should not be treated as permission for every promotional use. The client’s intended use, applicable requirements and agreed license need to be resolved before publication; get qualified advice where needed.
Put confidential screens, badges with personal details, unreleased products and backstage areas on the coverage brief where relevant. These are decisions to agree with the client, not universal bans on every event. Keep the assignment’s usage terms with the delivery record; the copyright guide explains the distinction between file access and a license.
Build a shot list with five coverage categories
Use the event schedule to turn priorities into positions and moments. For each must-have frame, record the time, location, intended use and who can help arrange access. Mark genuinely unrepeatable moments so optional details do not distract from them.
Scene setters
Photograph the venue, registration, stage and room before the busiest period. Include an exterior or sign that identifies the occasion when useful. During the event, add a room view that shows the actual attendance and atmosphere. Do not use framing or editing to imply a crowd that was not there.
Leadership and program moments
Cover introductions, keynote gestures, panel exchanges, demonstrations, award presentations and the audience’s response. Aim for clean expressions and visible faces, with microphones and lecterns placed thoughtfully in the frame. A handshake may need a different position from the preceding speech; learn the sequence before it happens.
Audience and networking
Look for listening, questions, conversation and reactions, while respecting the agreed coverage limits. Work at the edge of a conversation and avoid intruding on private discussions. Capture a useful range of participants instead of returning only photographs of the most prominent people.
Brand and sponsor details
Include legible signage, sponsor installations, products and demonstrations in context. Check whether a screen contains an approved slide before including it prominently. A logo-only close-up and a wider image of people using the installation serve different purposes; capture both when requested.
Supporting details
Hands, programs, table settings, awards and room design can connect the wider views and people photographs. Inspect badges, notebooks and screens for information that should not be published. Details supplement the story; they should not replace the agreed program coverage.
A real panel photograph: what to look for
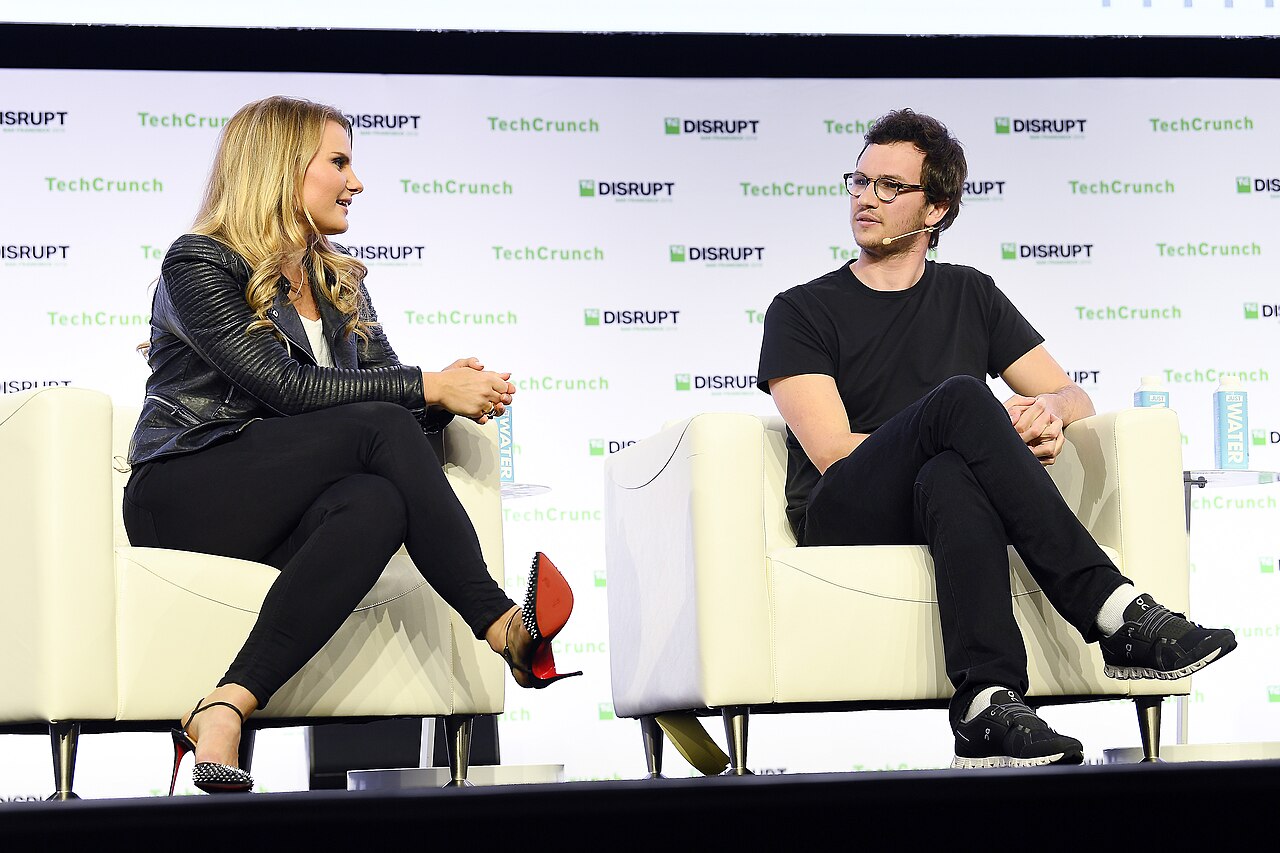
TechCrunch Disrupt San Francisco, October 2, 2019: Michele Romanow and Henrique Dubugras. Photo by Steve Jennings/Getty Images for TechCrunch, via Wikimedia Commons, CC BY 2.0. Resized Commons preview; no other changes.

This frame combines two useful elements: the interaction between the speakers and the event branding behind them. Their faces and gestures are visible together, so a communications team can understand the conversation without relying only on a tight headshot. The chairs, bottles and stage edges also show why background checks matter when choosing a final crop.
The published metadata lists a Nikon D5, 85 mm focal length, 1/200 second, f/4.5 and ISO 640. These are records of this photograph, not a recommended preset for another room. The image does not establish the photographer’s flash arrangement, the organizer’s approval process or the complete lighting plan.
For your own coverage, use the visual lesson to plan complementary frames: a wider stage view, a two-person exchange and a clean individual speaker frame. Do not infer that the original photographer missed any of those; this is one published photograph, not an audit of the full assignment.
Add variety without sacrificing useful coverage
First capture the clear frame the client needs. Then vary position and focal length where access permits. A lower angle can include stage design but may be unflattering or hide a face behind a lectern. Foreground layers can add depth but should not obscure the subject or sponsor wording. Close details are useful when they convey something specific.
Deliberate motion blur can work as an additional atmosphere image. Keep it separate from the sharp speaker, award or group photograph required by the brief. A creative treatment should not be the only record of an unrepeatable moment.
Prepare a kit for the actual room
Choose equipment around working distance, subject movement, available light and the files the client needs. There is no mandatory sensor size or universal lens combination for professional event coverage.
- Primary lens: a standard zoom can cover small groups and nearby interactions. If the camera position is far from the stage, plan enough reach rather than relying on a heavy crop.
- Low-light option: a wider aperture may help, but check depth of field for groups and speakers at different distances. A fast prime is an option, not a requirement to shoot every frame wide open.
- Backup: bring a workable camera fallback, charged batteries and spare cards. If your camera supports simultaneous recording to two cards, configure and confirm the intended mode before the assignment.
- Light: bring flash or another light only where permitted and useful. Test bounce against the actual surface; a high or strongly colored ceiling can make it ineffective or alter color.
Use a capture format that fits the delivery plan. RAW offers editing flexibility, while RAW plus JPEG can support a planned rapid-select workflow if you have the storage and process for it. RAW is not a promise of a fixed number of recoverable exposure stops, and it will not restore clipped highlights or motion detail that was never recorded.
Make lighting decisions before the keynote
Arrive early enough to make test photographs under the lighting that will be used. Ask the production team to show representative stage and screen states if possible. Inspect focus, motion, skin color, bright areas and banding at useful magnification; the room’s appearance to your eyes is not the whole test.
Bright conference room
Watch for a bright window behind the speaker and mixed daylight and artificial light. Choose an angle and exposure that keep the face usable. Set or check white balance for that area rather than forcing one correction across every room. Use fill or bounce only if permitted and if it improves the result without washing out a presentation screen.
Dim ballroom
Choose a shutter speed that can hold the movement you need, then balance aperture and ISO around it. Inspect a test frame of a moving person rather than assuming a stabilized lens will freeze the subject. Flash may illuminate nearby guests while leaving distant rows dark; decide whether that look suits the frame before relying on it for the whole room.
LED stage or presentation screen
Watch for clipped faces, saturated stage colors, screen brightness changes and horizontal bands. Silent electronic shutter can produce banding under some lights, with results depending on the camera and fixtures. Canon’s shutter-mode guidance recommends checking test images under the actual lighting. Consult your camera’s supported shutter and anti-flicker options; no single setting is guaranteed to solve every stage.
If the venue requires quiet shooting, agree a workable approach with the organizer rather than switching to a disruptive mode without warning. Take a short sequence when expressions or screen content change, but do not rely on bursts to fix persistent exposure or flicker problems.
Networking reception
Preserve enough ambient light to show the setting and add light selectively if allowed. Check the background before approaching a group. Avoid photographing people mid-bite or interrupting a discussion just to fill a coverage category. A brief, clearly requested group portrait can complement the candid coverage.
The low-light guide covers the exposure tradeoffs in more detail. The objective on site is a repeatable approach for each area, not one setting that survives every room unchanged.
A sample plan from briefing to delivery
The following is an illustrative plan for a half-day leadership event. It is a working template to discuss with a client, not evidence of a completed shoot or a promise of turnaround.
- Brief: internal recap and a public announcement; communications approves public selects. The organizer supplies names, the no-photo process and a list of confidential slides.
- Before doors open: photograph the room, registration and sponsor display. Confirm the planned camera position and test the stage lighting with the production contact.
- Opening and keynote: prioritize the speaker and a room view, then audience reactions. Hold publication of any frame containing an unapproved slide.
- Panel and break: capture the two-person exchange, individual speakers and selected networking moments. Take sponsor details during a break that does not conflict with a required program moment.
- First delivery: send a small, edited selection at the agreed time for the named approver. Include stable filenames and identify any frames still awaiting clearance.
- Full delivery: provide the culled gallery on the contracted schedule, grouped by event segment. Confirm requested file versions, permitted uses and the channel for corrections.
Before the event, add real times and contact names. If two must-have moments overlap in different rooms, resolve that conflict with the client in advance: change priorities, alter the schedule where possible or arrange additional coverage. One photographer cannot reliably cover both locations at once.
Cull and edit in three delivery tiers
Agree delivery times based on staffing, travel, editing volume and the approval process. Same-day selects can be useful for a live announcement, but they are a separately planned deliverable, not a universal expectation or a proven multiplier for social engagement.
Tier one: time-sensitive selects
Back up the files, then identify the small set that serves the immediate use: a keynote image, an award, sponsor coverage and an establishing frame as appropriate. Remove blinks, poor focus and unsuitable expressions before editing. Check names, visible text and restrictions before sending anything for approval.
Tier two: the main gallery
Cull repeated frames and weak alternatives. Organize by event segment or agreed subject, using stable filenames; see how to organize photos. Normalize exposure and color within each lighting situation, then review the sequence as a gallery. Do not synchronize a correction across unrelated room lighting without inspecting the results.
Apply noise reduction when it improves the selected photographs, rather than automatically to everything above a particular ISO. For Lightroom Classic, Adobe’s current Enhance guidance recommends Denoise before other tools, including AI masks and Remove. That is tool-specific guidance. Check supported files and processing time, and inspect faces, hair, text and edges after processing.
Tier three: requested finishing
Agree any additional work for a report cover, executive profile or campaign separately. Keep event documentation truthful: do not invent attendees, sponsor placement or program moments. Ask the client to specify any retouching constraints and maintain the original files and edit history.
For each tier, check the export rather than only the editing preview. Confirm pixel dimensions, color profile, filenames and image count against the delivery brief. Follow the receiving publication or printer’s specification where supplied; “high resolution” alone is not a complete instruction.
Deliver files the team can navigate
Choose the handoff around the client’s working environment. Email attachments can be reasonable for a few approved selects. A managed cloud folder can fit a company’s existing access policy and archive. A client gallery adds a visual browsing experience. None of these options fixes poor filenames, unclear permission or a missing approval contact by itself.
For a larger set, use clear groups such as Speakers, Networking, Awards, Sponsors and Details when those match the event. Include an initial selection only when it helps the recipient; avoid burying it among hundreds of near-duplicates. If you deliver separate web and print exports, name and explain them so the recipient knows which file to use.
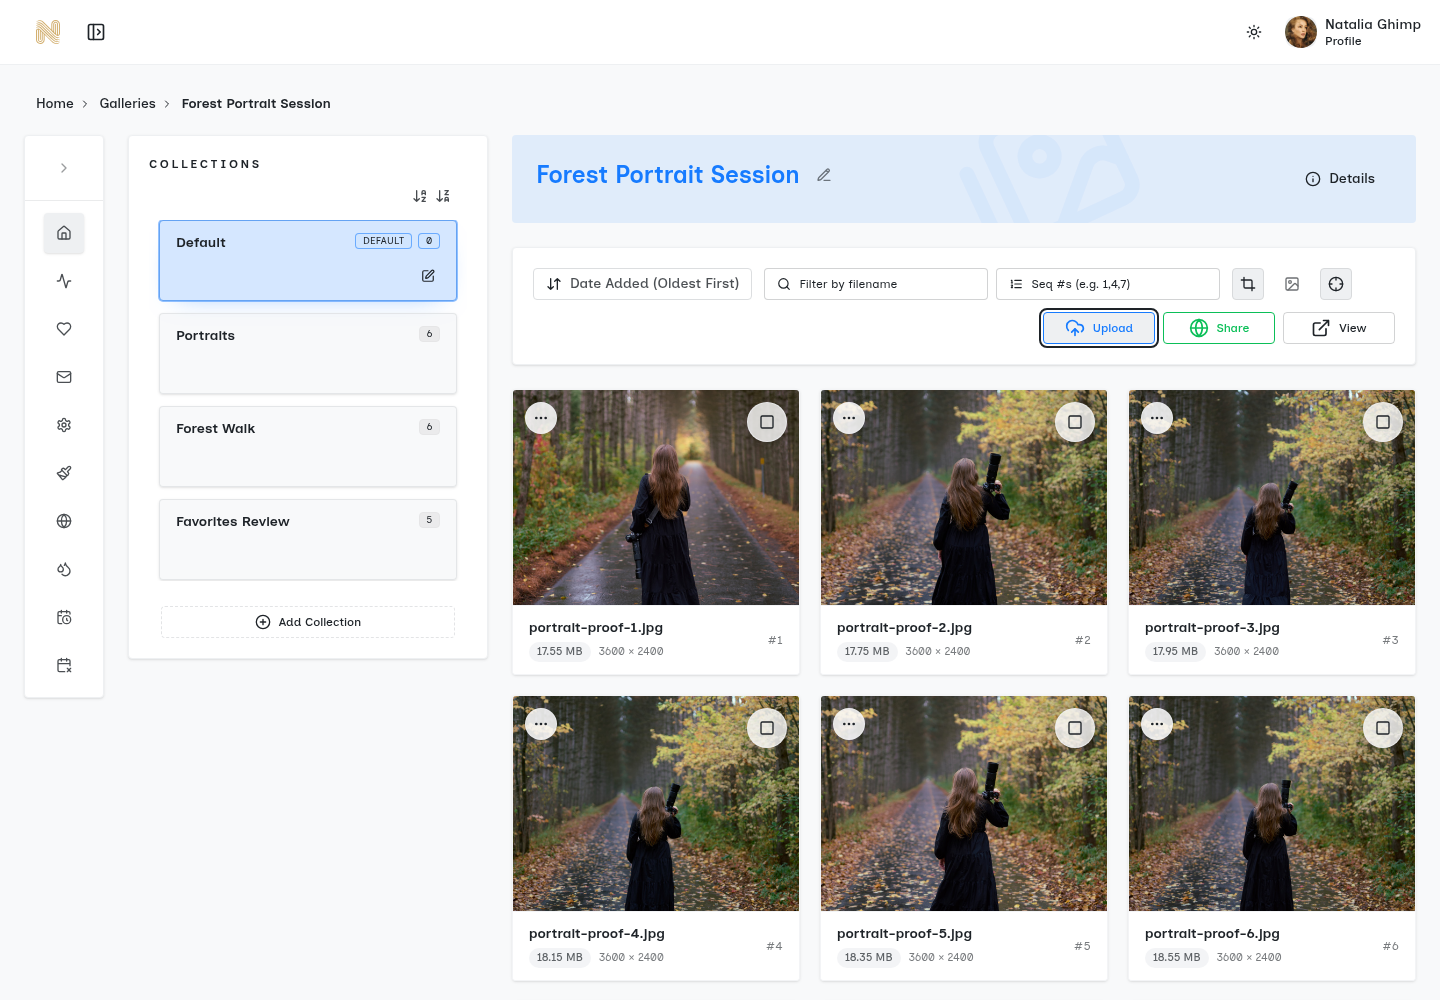
Existing genuine SendPhoto editor screenshot from a portrait gallery. It illustrates collections and file identification, not a corporate assignment or client approval. The event photograph above was not uploaded to this gallery.
SendPhoto handoff checklist
- Organize: use collections that match the brief and retain recognizable filenames. Collection names organize the gallery; do not treat them as separate access permissions.
- Set access: review the public-link and optional password settings before sharing. Recipients can forward a shared link and password, so confirm whether this fits the client’s policy.
- Set downloads: review whether downloads are enabled and which quality option is selected. If the client requires specific export dimensions or separate versions, prepare and label those files deliberately rather than assuming a universal web/print preset.
- Confirm choices: clients can identify selected files, but a favorite or like is not a signed publication approval. Record the approver’s decision with filenames and the intended uses in the agreed communication channel.
- Explain the handoff: identify the collection to start with, the delivery stage, any embargo or restriction, the download instructions and where corrections should be sent.
Keep a separate backup and the agreed license outside the gallery. Access controls do not prevent screenshots or recall files already downloaded. For the practical setup, use the SendPhoto getting-started guide.
Finish with an approved, usable set
Before closing the job, compare the delivered files with the brief: required people and moments, sponsor coverage, restrictions, file versions and the agreed deadlines. Flag a missed item honestly and agree any feasible follow-up; do not quietly replace an event moment with a misleading reconstruction.
A useful delivery is one the client can navigate and confidently route for its intended use. SendPhoto client galleries can support that handoff, alongside your coverage plan, editing decisions and recorded client instructions.